Plant containers play a crucial role in presenting your plants, and customizing them adds an exceptional, individual touch to your indoor or outdoor spaces. With ingenuity, you can convert ordinary plant pots into eye-catching art pieces that complement your greenery and elevate your surroundings. This article will explore several innovative DIY ideas for repurposing and personalizing plant pots.
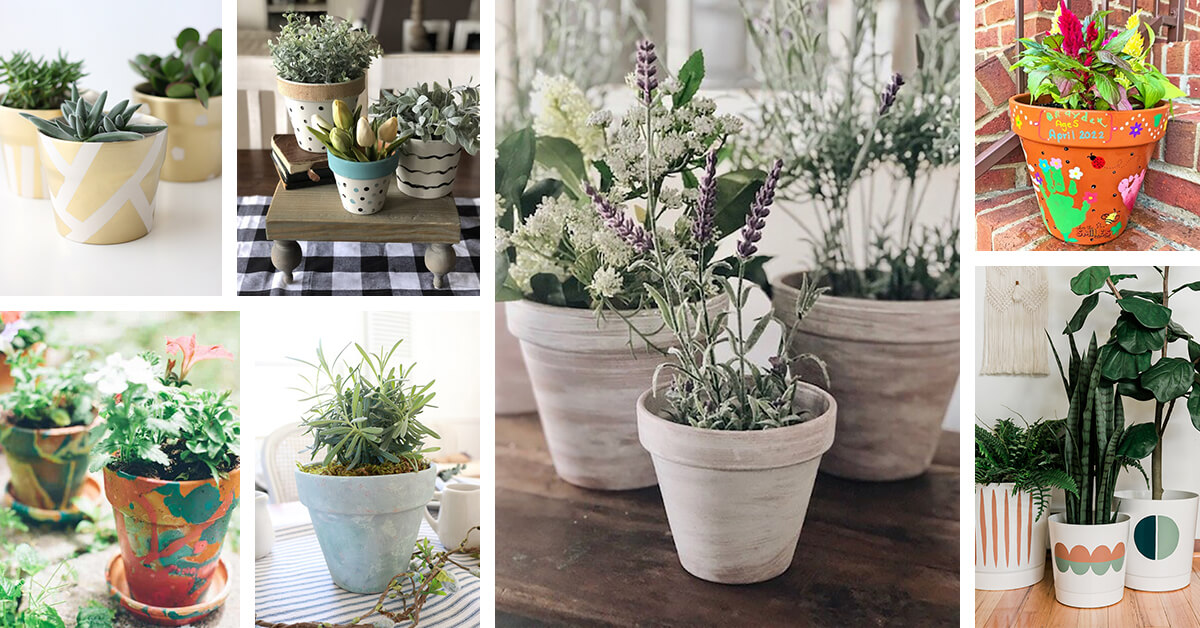
Hand-Painted Plant Pots
Painting is one of the simplest yet most impactful methods to customize your plant pots. Acrylic paint suits various surfaces, including terracotta, ceramic, and plastic pots. Here’s a step-by-step guide to creating your hand-painted plant pots:
- Thoroughly clean the pot’s surface to ensure proper paint adhesion.
- Apply a primer layer, especially on terracotta pots, to prevent paint absorption into the porous material.
- Once the primer dries, unleash your artistic side with your choice of colors and patterns. Geometric shapes, abstract designs, or a minimalistic color palette can all create a striking effect.
Remember to apply a clear, waterproof sealant to your hand-painted plant pots to protect them from water and UV damage.
Paper-Adorned Plant Pots
Paper-adornment, or decoupage, is a flexible technique that decorates surfaces with paper cutouts and special glue, usually Mod Podge. You can create remarkable, bespoke plant pots using materials like gift wrap, tissue paper, or even pages from old books. Here’s how to adorn your plant pots with paper:
- Place your selected paper cutouts onto the pot, smoothing out any creases or air bubbles.
- Once the paper is positioned, apply another coat of Mod Podge over the entire surface to seal and protect your design.
Allow the Mod Podge to dry thoroughly before using your paper-adorned plant pots for your beloved plants.
Fabric-Covered Plant Pots
Fabric-covered plant pots are a distinctive and visually appealing addition to your space. This DIY project is perfect for utilizing any fabric remnants you might have.
Here’s how to create your fabric-covered plant pots:
- Measure and cut a piece of fabric large enough to encircle your pot, leaving extra material to fold over the top and bottom edges.
- Apply a fabric-compatible adhesive, like fabric glue or hot glue, to the pot’s surface and carefully wrap the fabric around it.
- Fold the extra fabric over the top and bottom edges, securing it with more adhesive.
Tiled Plant Pots
Tiled plant pots are a beautiful way to incorporate color and texture into your plant displays. This project requires broken tiles, glass, or ceramic pieces, which can be sourced from craft stores or repurposed from old, damaged items. Here’s how to create your tiled plant pots:
- Plan your design by arranging the tile pieces on a flat surface or sketching it on paper.
- Apply a layer of tile adhesive to a small pot section and press the tile pieces into it, working in small teams to ensure the glue doesn’t dry out.
- Once the entire pot is covered and the adhesive has dried, fill the gaps between the tile pieces with grout, smoothing it out with a sponge or your fingers.
In conclusion, personalizing your plant pots through DIY projects is an enjoyable and fulfilling way to express your creativity and add a distinctive touch to your environment. Whether you opt for hand-painting, paper-adornment, fabric-covering, or tile designs, these imaginative ideas will boost the aesthetic appeal of your plants and showcase your unique personality and style. So gather your materials, unleash your creativity, and embark on your next DIY plant pot adventure. Your plants, as well as your living space, will undoubtedly appreciate the effort. Happy crafting!